CC2026 Guides Whimsy in Bloom
Whimsy in Bloom
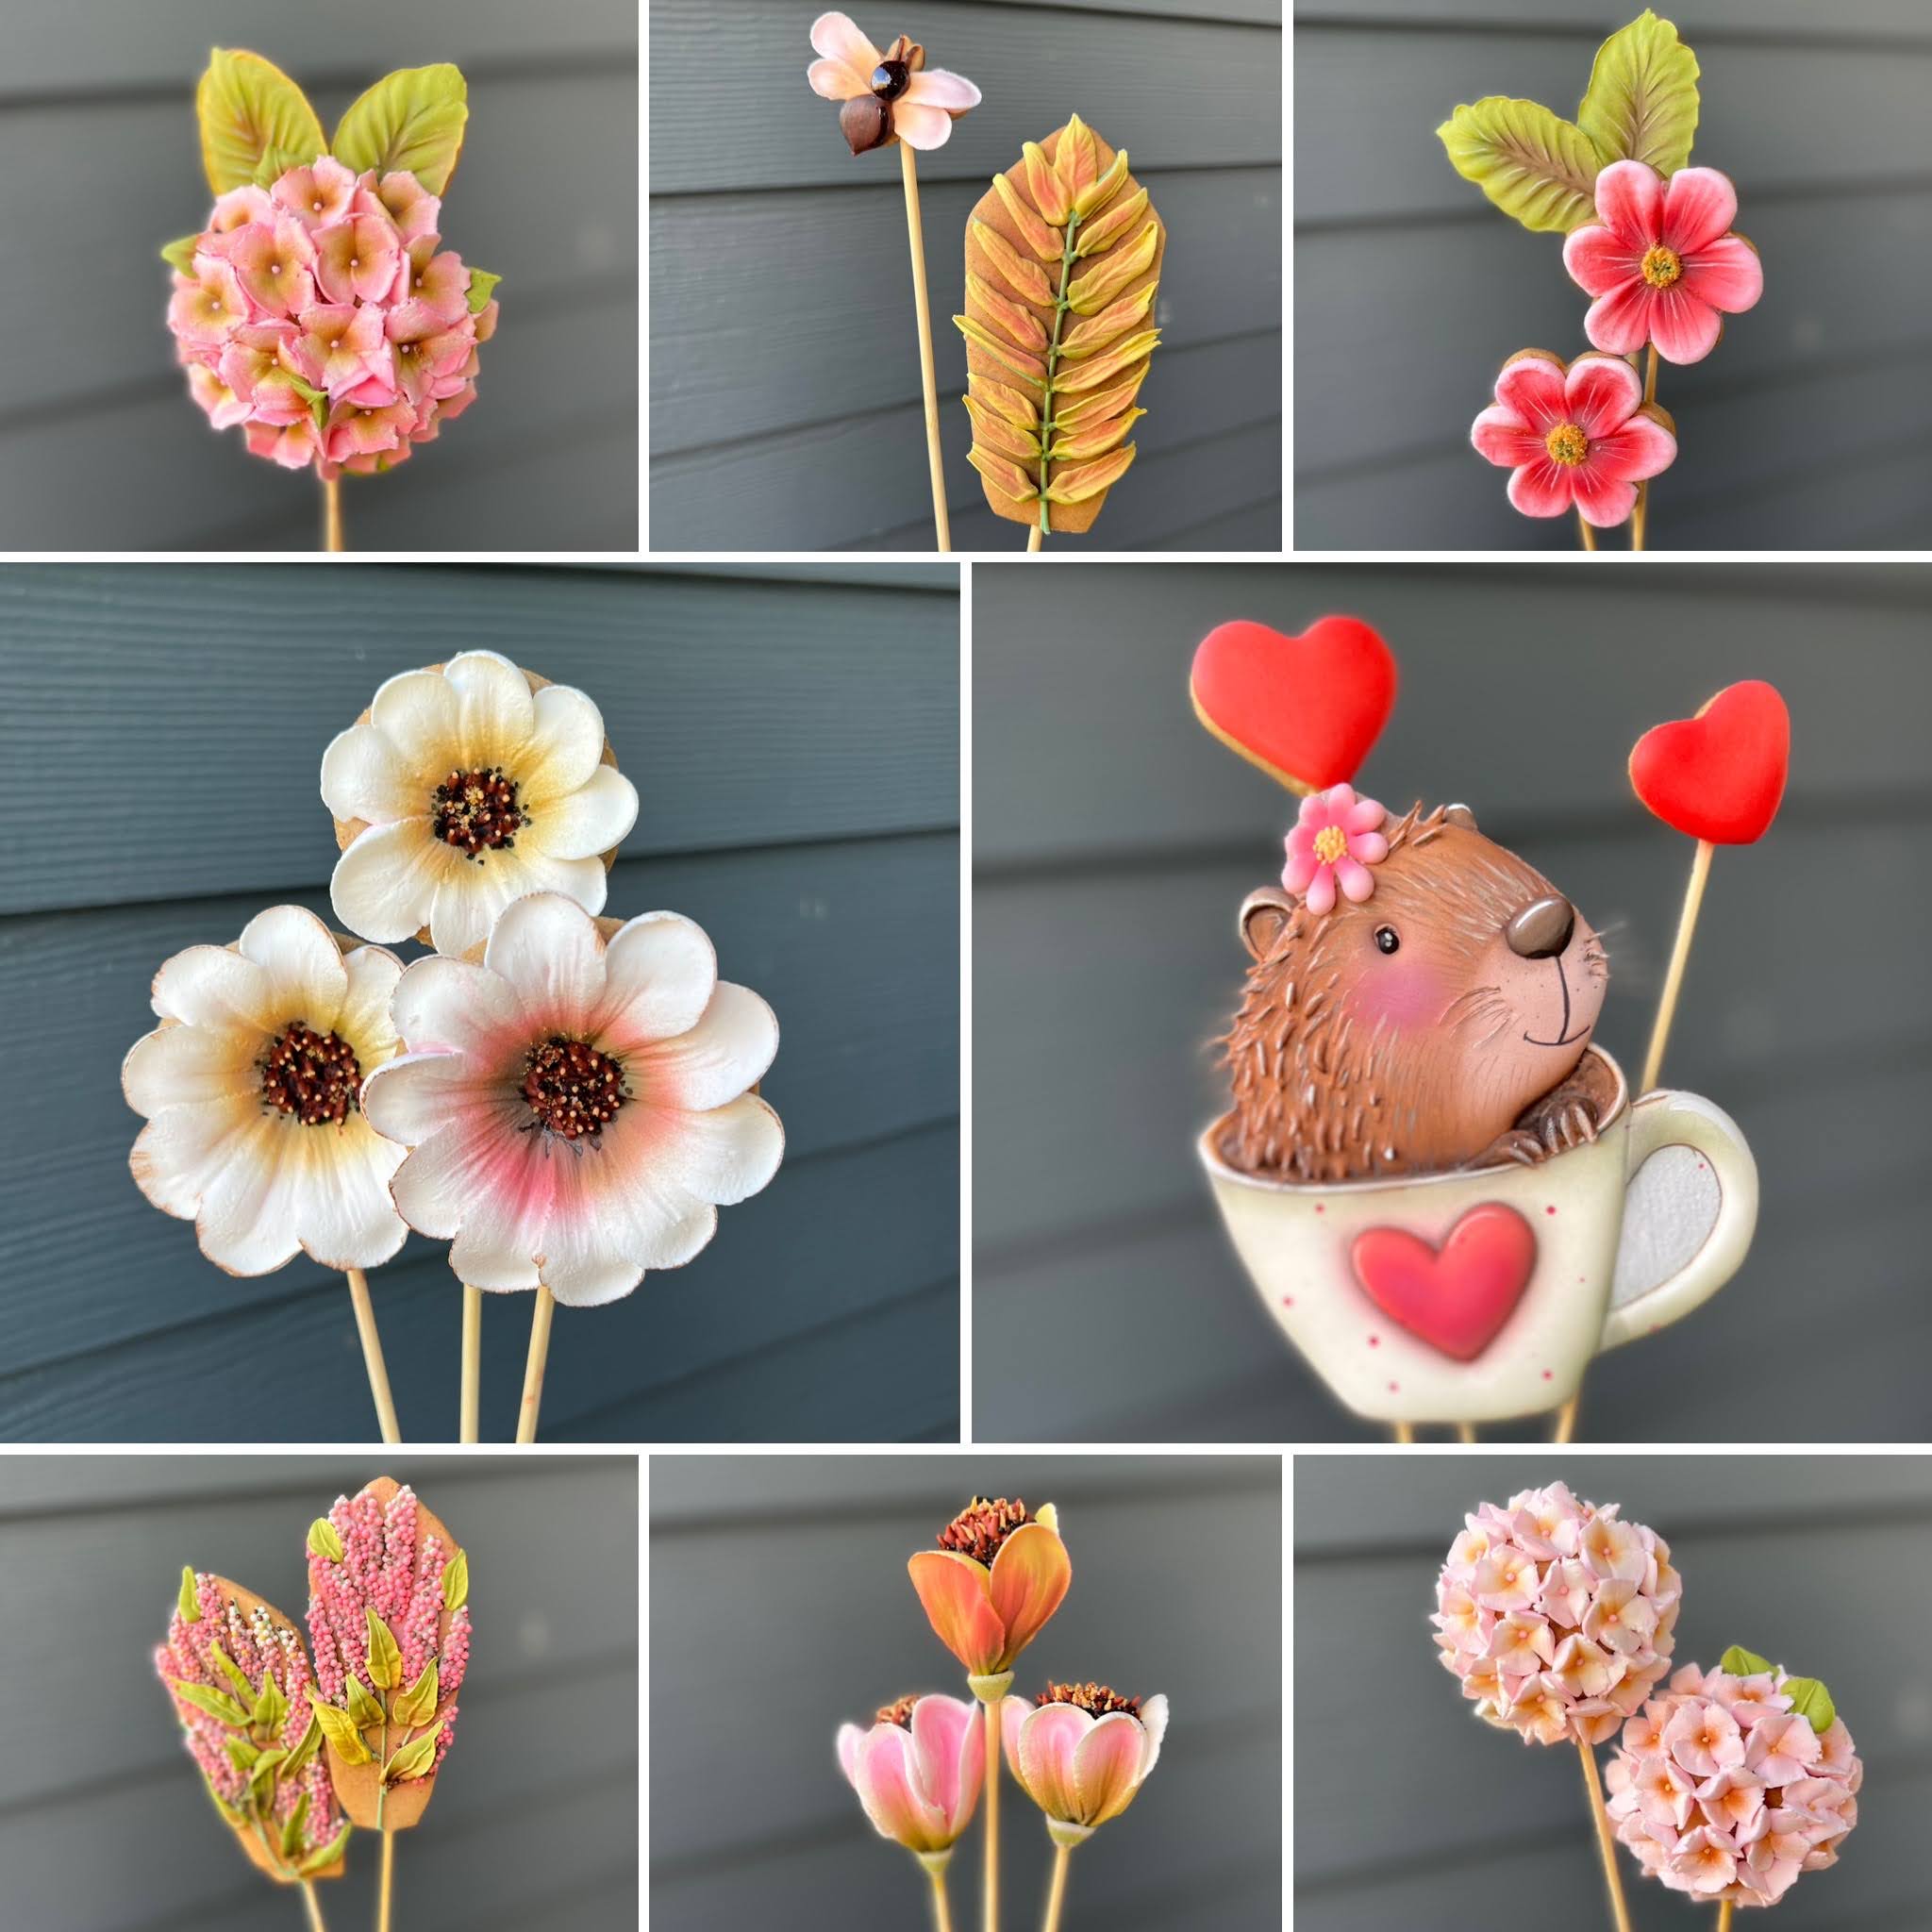
Sculpted Floral Cookie Bouquet with Capybara
CookieCon Class Companion Guide
Thank you so much for joining my CookieCon class!
This guide is designed as a companion to our workshop—a quick reference for the techniques, tools, baking notes, and decorating order we practiced together.
 View full size
Project Overview
In this class we created:
- White Sculpted Flowers
- Spring Blossoms
- Pink Floral Blooms
- Hydrangea Clusters
- Botanical Spike
- Green Leaves
- Pink Berry Stems
- Butterfly Accent
- Heart Accents
- Capybara in Love
Supplies
Cookies
- Floral cookie bases
- Character cookie base
- Cookie sticks
- Wafer paper
- Thin wafer paper strips for fur
Royal Icing
Prepare royal icing in several consistencies:
- Medium piping
- Stiff piping
- Flood consistency
- Detail consistency
Tips Used in Class
| Tip | Used For |
|---|---|
| Wilton 104 | White flowers, spring blossoms, pink flowers, butterfly wings |
| Wilton 13 | Flower pistils and floral centers |
| Ateco 101 | Hydrangea blossoms and flower cups |
| Ateco 66 | Botanical spike leaves and berry stem leaves |
| Ateco 70 | Hydrangea leaves |
Baking Notes
Hydrangeas
Bake inside hemisphere silicone molds.
Available mold sizes: 4–9 cm
For this class we used:
- 5 cm
- 8 cm
Remember:
The final flower size depends on both:
- the diameter of the hemisphere mold
- the diameter of the circle cutter used for the cookie
Experiment with different combinations to create your own floral proportions.
White Flowers
These flowers are also baked using hemisphere molds.
To achieve a softer, flatter bloom:
- Use a larger hemisphere mold, 8 cm.
- Cut the cookie using 5 cm and 6 cm circle cutters.
- Do not press the dough too deeply into the mold. A gentle curve creates a more natural flower.
Spring Blossoms
Shape these cookies by hand into small egg forms.
The exact weight is less important than keeping all blossoms consistent in size.
For this class, each blossom weighed approximately 6–7 g before baking.
Professional Baking Tips
- Gently press the dough into hemisphere molds using a rounded tool, such as measuring spoons, to create a smooth, even dome.
- Cookies baked in silicone molds generally require approximately twice the baking time of flat cookies.
- Insert cookie sticks immediately after baking while the cookies are still warm and soft.
- Allow cookies to cool completely before decorating.
Decorating Order
Working in a consistent order helps keep the bouquet organized and balanced.
- White flowers
- Spring blossoms
- Pink flowers
- Hydrangeas
- Leaves
- Botanical spike
- Berry stems
- Hearts
- Butterfly
- Capybara
Once all elements are completely dry:
- Airbrush
- Add edible dusts
- Paint details
- Finish with highlights
Flower Notes
White Flowers
Tip: Wilton 104
- Pipe petals first.
- Gently pull each petal with a brush to create a soft ombré effect.
- Build textured centers using brown icing, black sugar, and yellow “pollen.”
For the pollen effect:
Crush baked cookie crumbs with yellow gel color using a mortar and pestle until a fine texture is achieved.
Suggested shading:
- Warm blush
- Soft olive
- Ivory
- Dark brown center
Spring Blossoms
Tip: Wilton 104
Pipe petals one by one and soften them immediately with a brush.
Once all petals are finished, lightly brush upward to create additional texture and movement.
Flower centers:
- Brown stamens
- Black sugar
- Yellow pollen
- Green pistils, optional
Finish with a soft green flower cup using Ateco 101.
Pink Floral Blooms
Tip: Wilton 104
Pipe every other petal first for better spacing.
Pull each petal toward the center with a brush while still fresh.
Suggested finishing:
- Green center
- Gold stamens
- Yellow pollen
- Fine white painted highlights after drying
Hydrangea Clusters
Tip: Ateco 101
Build each cluster from many individual blossoms.
Small blossoms:
- Gold center
- Optional touch of brown
Large blossom:
- Green center
- Light brown accents
Leaves: Ateco 70
Botanical Spike
Tip: Ateco 66
Build the green framework first.
Pipe long botanical leaves over the structure.
Create texture by brushing lightly along the leaf edges after airbrushing.
Green Leaves
Pipe flat leaves and pull the center gently using a flat brush.
Suggested shading:
- Dark green center
- Touch of brown
- White highlights after drying
Berry Stems
Build the framework first.
Add additional volume where berry clusters will sit.
Texture is more important than perfect symmetry.
Finish with leaves using Ateco 66.
Butterfly
Tip: Ateco 101
Pipe soft pink wings.
Shade the center slightly darker.
Finish with:
- Dark body
- Fine black details
- White highlights
Capybara
The capybara serves as the centerpiece of the bouquet.
Main stages:
- Outline and flood the mug
- Build the capybara
- Add flower transfer
- Insert wafer paper fur strips
- Continue building fur with royal icing
- Dry completely
- Airbrush
- Paint individual fur hairs
- Finish with whiskers and highlights
For the fur:
Layer dark brown, medium brown, ivory, and finally white painted hairs to create realistic depth.
Bouquet Assembly
Use any sturdy box or container that fits your finished bouquet.
To create a stable arrangement:
- Secure floral foam inside the container.
- Every cookie stick should reach the bottom of the foam.
- Position the heaviest cookies near the center.
- Build the bouquet from back to front.
- Fill empty spaces with greenery.
- Rotate the bouquet often while arranging to check balance from every angle.
Color Inspiration
This project is intentionally open to interpretation.
Use your own favorite color palette while remembering a few artistic principles:
- Warm tones create softness.
- Green brings freshness.
- Brown adds realism.
- Ivory softens transitions.
- White highlights create light.
Don’t be afraid to experiment and make the bouquet uniquely yours.
Useful Materials
The following materials are included with this guide:
Nature is never perfectly symmetrical—and that is exactly what makes it beautiful.
Allow each flower to have its own personality, enjoy the creative process, and remember that tiny details, thoughtful color, and soft shading are what bring a bouquet to life.
Thank you so much for creating with me at CookieCon.
I can’t wait to see your own beautiful bouquets bloom.
