CC2026 Guides Forest Illusion
Forest Illusion
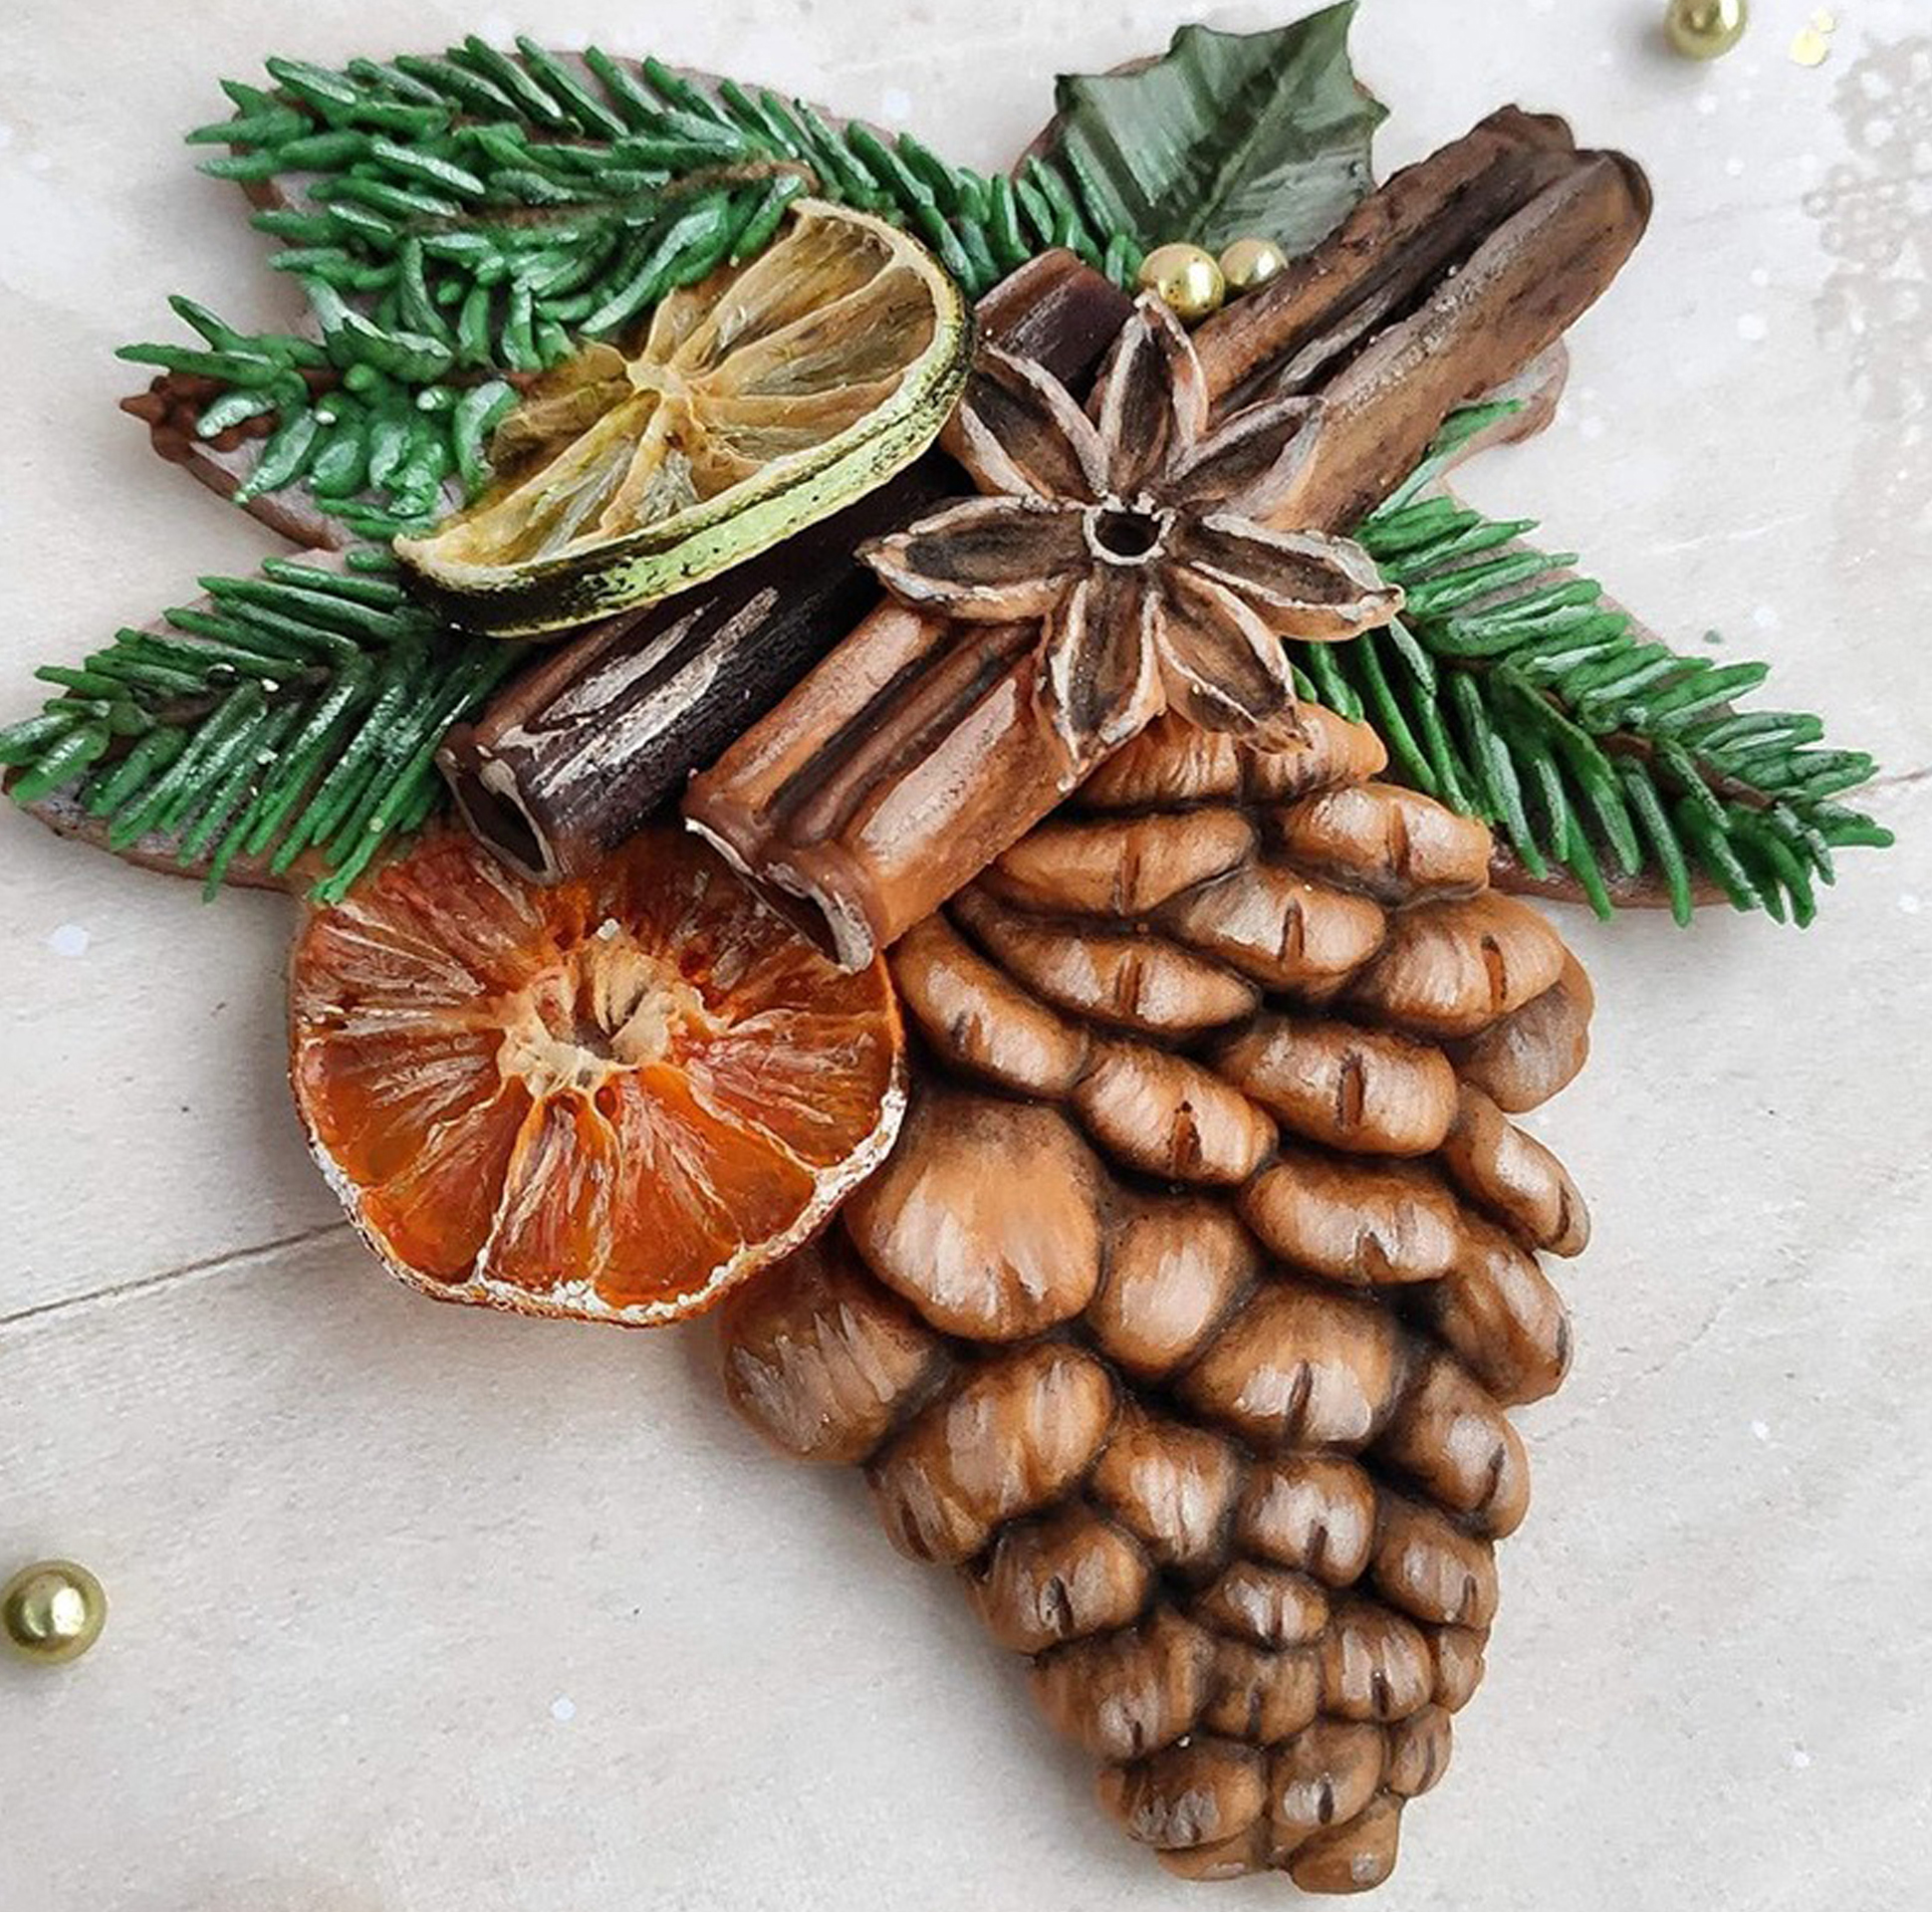
Hyper-Real Pine Cone Cookie
Hands-On Class Companion Guide
Thank you so much for joining my CookieCon hands-on class!
This short guide is designed as a companion to the class and a reminder of the main supplies, textures, and general workflow we practiced together.
 View full size
What We Made
In this class, we created a winter-inspired pine cone cookie arrangement with edible botanical accents.
The pine cone cookie itself begins as a flat cookie base. The dimensional effect is created through piping technique, layering, side texture, shading, and thoughtful edible details.
Main Techniques Covered
- Dimensional pine cone scale piping
- Working with Ateco 59 tip
- Creating visual depth on a flat cookie base
- Adding texture to the side of the cookie for realism
- Building edible cinnamon stick accents
- Using dried citrus as part of the edible composition
- Piping rosemary-style greenery
- Creating star anise on a wafer paper base
- Airbrushing, dry dusting, and final painted highlights
Basic Supply List
Cookies & Edible Elements
- Pine cone cookie base
- Small cinnamon stick cookie pieces
- Dried citrus slices
- Wafer paper base for star anise
- Optional small support cookies or edible accents
Icing
- Royal icing in piping consistency
- Slightly stiffer icing for dimensional details
- Small amount of icing for attaching accents
- White icing or white gel color for final highlights
Tools
- Piping bags
- Ateco 59 tip
- Small round tip or tipless bag
- Fine detail brushes
- Slightly damp brush for shaping
- Soft dusting brushes
- Tweezers
- Dehydrator or drying fan
- Airbrush
Coloring
- Airbrush colors
- Edible dusts in warm brown, amber, green, and shadow tones
- Gel colors for final details
- White gel color for highlights
- Alcohol or clear extract for painted accents, if needed
General Decorating Stages
1. Prepare the Cookie Base
Transfer the design onto the cookie and plan the direction of the pine cone scales before piping.
The pine cone begins flat, so the placement and direction of each section are very important.
2. Pipe the Pine Cone Texture
Use Ateco 59 to pipe the pine cone scales.
Work with direction, overlap, and pressure to create a natural look. Some upper areas may be built slightly higher to make the dimension more believable.
3. Add Side Texture
Continue some texture onto the visible side of the cookie.
This small step helps the cookie look more rounded and realistic instead of flat.
4. Create Cinnamon Stick Accents
The cinnamon sticks are additional cookie pieces.
Use the natural cookie texture as part of the design, adding icing only where extra raised texture and detail are needed.
5. Add Citrus and Greenery
Dried citrus slices can be trimmed if needed and lightly finished with icing details to help them blend into the edible composition.
Pipe rosemary-style greenery with natural movement and layered direction.
6. Create the Star Anise
Use a wafer paper base for support and pipe the star anise structure with Ateco 59.
A slightly damp brush can help soften and shape the icing while keeping the dimensional look.
7. Dry Before Tinting
Allow the cookie and accents to dry well before adding color.
Good drying time helps preserve texture and keeps the details clean during airbrushing and dusting.
8. Add Color and Depth
Begin with airbrushing, then add edible dusts for shadows and depth.
Use darker tones in recessed areas and lighter tones on raised sections.
9. Finish With Details
Add final shadows, fine painted lines, and small white highlights.
Highlights should be used carefully on scale edges, citrus lines, cinnamon ridges, greenery tips, and star anise details.
Important Class Reminders
- The cookie may start flat, but the illusion is built through texture and shading.
- Direction matters—every scale should follow the shape of the pine cone.
- Side texture helps create a more realistic 3D effect.
Useful Materials
The following materials are included with this guide:
